that are up there and the ways to avoid them and how to act if you encounter
them. Enjoy!
Author – Naomi Smith
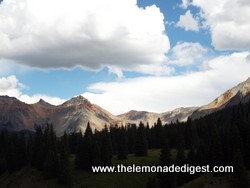
I have enjoyed our whole trip. They are something that we have climbed,
hiked, explored, four-wheeled, utved, and sledded, but whenever we go up there
we keep in mind the many dangers. For example- avalanches, mountain lions
(I have an article on mountain lions on our website), bears (my mom has an article on bears on our website), cliffs, surviving
up in them, and things like that.
especially if it was in the winter. But if something like that ever
happened here is what you would want to do-
blanket. It is also a really good idea to have a knife with you, you can
use it to defend yourself and others, get food, cut things to make shelter, get
yourself out of ice, and quite a few other things. Make sure that you
have good boots on; this will be very helpful if you have to travel a long
distance or if you have to climb something steep. Make sure that all the
clothes that you wear are nice and warm in layers, not only will this be good
if you’re making a quick trip up to the mountains, but also if you get stuck
there unexpectedly. They are handy because the weather can change quickly.
worse. Keep calm and don’t freak out. Eighty percent of surviving
is keeping calm. Keeping calm is extremely important if you are the
leader of a group that is stuck up on a mountain. If you panic then
everyone else will, if they see their leader is worried than they will think
that they should worry. It is fine, of course, to ask for help and or
suggestions.
shelter. Shelter is very important, it will help you to stay out of the
cold, keep you somewhere sheltered if it is snowing or storming, help protect
you from animals, and will also help with getting a good night’s rest.
shelter. It is optional to make the camp in a protected valley, a hollow,
or a dense forest. I will say that I have heard that building a shelter
in a valley is not a very good place because it will be colder down there.
One of the places that you would most definitely not want to build your shelter
at is under a cornice (cliff of overhanging snow)! This is because some
of the snow could break off the end and cause issues – like getting stuck under
a lot of snow!. The next thing to do is look around, what is there that you can
just use around you.
stuff to build the shelter, this is because you will sweat and then the sweat
will freeze, or get really cold, and that will make matters worse (this can
cause hypothermia).
Once you’ve taken a look around, then from what you
have available you can pick which shelter you wish to make. There are all
different kinds, there is-
tree with snow piled up all around it and then begin to dig down around the
tree, in the snow, till you reach the bottom or just till you have it pretty
deep down. Then cover the inside with trees branches that are from other
trees. Then for the top, cover it with things like a poncho. Put the
entrance and exit a direction that points out of the wind.
place where the snow is hard or has a firm crust (any snow that is not like
this should be avoided). Once this has been accomplished, make sure that
the place is not by a cornice or in an avalanche area. Then build a
tunnel that goes down into the snow, the tunnel should be one yard (or one
meter). After this dig out the cave, make the roof tall enough to be able
to sit in, make ventilation holes (There should be two, one in the roof and one
in the door that are 3-4 inches in diameter or 7-10 in centimeters ) and the
roof should be 18 inches ( or 30 centimeters) thick. The entrance should
be small, this will help with blocking out more cold air, and you can block the
entrance with your backpack or something like that. The entrance should
still have a little space for clean air to get in to the shelter.
monoxide (CO2). This is a gas, like in propane, that will come very
unexpectedly. The reason why this is so dangerous is because the first
symptoms to this are fainting and collapsing. So being alone in one of
these shelters can be very risky! Something that will eliminate carbon
monoxide risk in half is getting four hours of fresh air every day.
piling up snow into a wall and sleep on the side that isn’t pointing toward the
wind. There is a danger to this though; there is a risk to the snow on
the wall falling over on the person sleeping by it.
evergreens with some sort of material or a plastic sheet. Then cover that
with snow. After letting that sit for 1-2 hours (The snow needs to be
hardened so you may have to do it longer) after that take off the material that
was used to make it and then form an entrance. It is a good idea to take
a bag and fill it with tree branches to put in the entrance of the shelter.
with well packed drift snow and dig a square that is horizontal in the snow
about chest high. Then at the top of the square make a horizontal
rectangle (keep the snow that you remove to make this square, you will need it
or something later.) Then dig up on the rectangle that was just made,
your goal is to make a platform like thing to be able to sleep on. The
sleeping area is up in the cave because heat rises. After this is
accomplished make the entrance go out, at ground level, about two more feet and
down for about one more foot. Now the shelter should look like a T. Next
take the snow that has been saved and cover the top of the T with the extra
snow that was saved, make sure to fill in all the cracks with snow.
Finely make a ventilation hole in the roof and the shelter is complete.
The sleeping area in this is the platform like thing at the top of the shelter.
trench that is long enough for a sleeping bag and wide enough for one to two
people; the depth just depends on the persons that are in it. The trench
should be dug at a slant; this is because the heat can get built up at foot
end. Make sure to keep the snow that is taken out to build the trench,
you will use this later on. Also when the snow is being taken out make
sure to take it out by cutting blocks, this is because the blocks are used to
make the roof. They should be 8-12 inches thick. Make a notch in the shelter
after that goes along all the inside of the shelter. Then make one of the
blocks a triangle shape for the one end of the shelter, you of course would not
that on the other end, because then you would have no way to enter or exit the
shelter! Then after this start with placing the blocks for the roof.
The blocks should be angle trimmed and the first block should be half sized
from the rest of them (Making the first block half sized is essential because
if this is not done then there will be a weakness in the roof.) Also make
sure to remember to put in the ventilation hole, this is also essential.
Finally after all these steps are completed your shelter will be
finished. When you are in it though you can cover the entrance with a
backpack or something like that. Make sure to have stuff under you when
it is slept in.
should not be used as a long term shelter.
igloo.
snow off of your equipment and bed.
into. They are very dangerous and hurtful. But if you or some else
ran into one you would want to-
temperatures are changing up and down. This can cause an avalanche.
Other things that trigger an avalanche are vibration, shearing, and
overloading.
explosion, a big machine, or thunder even, starts an avalanche.
or a skier skies starts an avalanche.
an area and it cannot be held any longer where it is and it therefore causes an
avalanche.
the avalanche is wet and damp, because of this the snow will actually make its
own banks as it goes down. When the avalanche stops moving it goes solid,
this makes extremely hard to get people out of it if they are caught in the
avalanche. The avalanches that are in the spring are sometimes caused by
this because of all the snow melting. These are the most destructive kind
of avalanche, because whenever they go into towns, and such, they take out everything
in their way.
category of Loose Snow Avalanches. This is where the avalanche starts of loose
snow. These avalanches are when the snow going down the mountain slowly gains
speed and eventually gets going very fast. These ones are also very
dangerous because they are a mix of high speed and the avalanche. The
wind alone can be extremely damaging. The danger of these avalanches passes
very fast.
snow, therefore causing the avalanche.
snow, therefore causing the avalanche.
build up over time then they release.
where snow builds up on an area and its side facing the wind becomes
indented. When the snow above the indention becomes too heavy a huge
chunk of the snow mountain will come off and can make an avalanche. These
things are also dangerous by themselves.
stuck in an avalanche you might have about one hour to get them out, though
there have been some stories of people surviving in avalanches for 72 hours
(three days). When searching for the victim, look around the top and
edges of the avalanche and where there are more debris the more likely it is to
find the person there. Something that will help is forming a search party, but
this may take a little while to do so it would lessen the person’s chance of
survival. Ask around to find out where the last place was that the person
was seen at and then from that information you can determine where the victim
would probably be. If you find anything related to the person, such as
equipment, look EVERYWHERE around the area! Sometimes though the victim will
not be in the avalanche because they can be thrown to areas around the
avalanche. You can also look for snares that the person would have gotten
caught on; these could be things like rocks, trees, and plants. Also,
where there is a bend in the place where the avalanche came down it is very
possible that is where the person is stuck.
immediately! If they are knocked out revive them immediately! It is
also a good idea to carry a collapsible shovel to be able to dig out
someone.
you’re falling down and you are completely covered by the snow, put your arms
out in front of you to try to make an air space for when it stops. When
you’re tumbling down in the snow you will want to do swim motions with your
hands to try to stay up in snow as much as possible. This will make it
easier for you to get out and easier for people to find you. Grabbing any
object to help you stay as far above the ice as possible. Also if you are
wearing skis, you can try to take them off. They can injure you.
injured. So, first you will want to spit and see which direction the spit
goes. When you see which direction is down then began to dig up and out
of the snow, immediately and quickly! If you are in hard and solid snow
(This will happen when the snow is wet and slushy when it is going down the
mountain and such) it will be very difficult to get out.
you.
it were people will be able to locate where you are buried in the snow.
snowmobiling. So be careful if you do!
such in the mountains by yourself.
long pole to help you get out of the snow. There are collapsible ones
that are good and there are also some ski poles that will become one of those
poles when you hook them together.
survival. A fire is helpful as it takes away insects and bugs, dries
clothes, cooks food, can be used as a signal, purifies water, and will keep you
warm.
anywhere, make sure to take waterproof matches with you. These things are
really helpful and handy. If you know how to use them, then they can be a
great way to get a fire started fast. Make sure to practice using the
matches at home, even outdoorsman have been found lost in the wilderness
without a fire. Now there may be an instance when a person is trapped in
the wilderness with no matches or other tools that will help make starting the
fire easier, if you are in this situation then there is actually a way to make
a fire without these things. Here are the steps to do that-
need-
1. A knife.
2. Kindling. Make sure to have long and short pieces of kindling.
3. Wood. Get the wood off of a tree, not off the ground. The wood should be dead that is gotten off of the tree.
4. A bow that is a curved stick of two feet.
5. A string.
6. A socket.
7. A lube. This can be anything oily.
8. A spindle. The spindle needs to be ¾ to 1 inch thick and 12 to 18 inches. One end of the point should be pointed and the other end should be rounded.
9. A fire board, it should be ¾ to 1 inch thick, 2 to 3 inches wide, and 10 to 12 inches long.
10. A tray, this can be a piece of leaf or bark. They tray should not be a piece of dead wood.
11. A nest, this can be made out of cattail fuzz, leaves, dry bark, grass, or something else that will catch on fire like that, then form it in to a bird’s nest shape.
measurements. After this is completed form a shallow bowl in the middle
of the board, it should be a half an inch from the edge. Then form a V
shaped notch on board. After that preparation is finished tie the
string to the ends of the bow, make sure that the string is nice and
tight. You will also want to make the socket smooth.
First take the fire board and then take the needle and put it inside of the
hole in the board. Push the board to the ground. Then place bow
(With the string) on to the needle (The pointed end should be up). The
string should be looped on the needle. The loop should be placed in the
middle of the bow). Now place the socket object that you got on the top
of all this (There should be a whole in the middle of it for the needle to go
into). Then take the leaf or bark tray and put it under the end of the
needle, with one end of it sticking out. Make sure to have your nest
handy!
your foot on the fire board and your hand on the socket. Grab the bow and
pull it back and forth, first do it slowly and then speed up the motions.
Don’t worry if the spindle spins, it is supposed to do that. Just keep
doing this till you get a smoke and ash. As soon as you get the ash push
it in to the tray (you do this by tapping the spindle on the tray to put the
embers into the tray) and then from the tray into the nest. When it is in
the nest begin to blow on it. After you get the fire started add some
kindling to your nest slowly and as your fire builds add bigger pieces of wood.
it in the wild. Also remember that there are more than one bow and drill
way stills to start a fire.
interesting how it all works, but this is just one example.
then you will come across ice that you have to travel across or maybe you just
come across ice in another survival situation. But in whatever case here
is what you want to do.
bring a pole that is nice and long. This will be a help if someone falls
through the ice. When the pole is being carried it should be held
horizontal. Also it is handy to have a rope with you if you are traveling
with other people, because then all the members can hold on to the rope, not
tied, and this will keep the group together and will help keep everyone in
single file when you are going across ice.
the thin ice on this area and then you reach ice that is thick enough to hold
you, pull yourself up on to the ice. After this is completed roll across
the ice to land and then role around in the snow (this is done because the snow
takes out the water that is on the person). Definitely want to get into
warm clothes as soon as possible.
then as the person is falling in then they should put the knife into solid ice,
then using the knife pull themselves up and out of the water.
their arms out and hold themselves up and then they should pull themselves up
with their arms and legs.
through the ice could possibly get hypothermia. There are two stages of
hypothermia-
doesn’t have enough time to produce enough heat for the person.
when the person’s brain gets cold.
hypothermia, but if you or someone does then you will want to-
them in a tube tent and an emergency blanket.
warm drinks, and, if you can, get the person a warm bath.
so be careful when doing anything that might make you sweat.
very harmful and something that you definitely don’t want to get!
surviving up in the mountains or just in the wilderness in general, like I said
at the beginning of the article, though we have seen on more than one of our
many trips up into the mountains places where avalanches have happened.
We take every precaution, starting with contacting my grandma to tell her
where we are going and when we should return. We have warm clothes,
water, emergency kits, first aid kits, and survival items.
that I highly recommend. If you want to learn more on this subject and
loads of other situations read them!
answers to questions that I had about the subject and more!